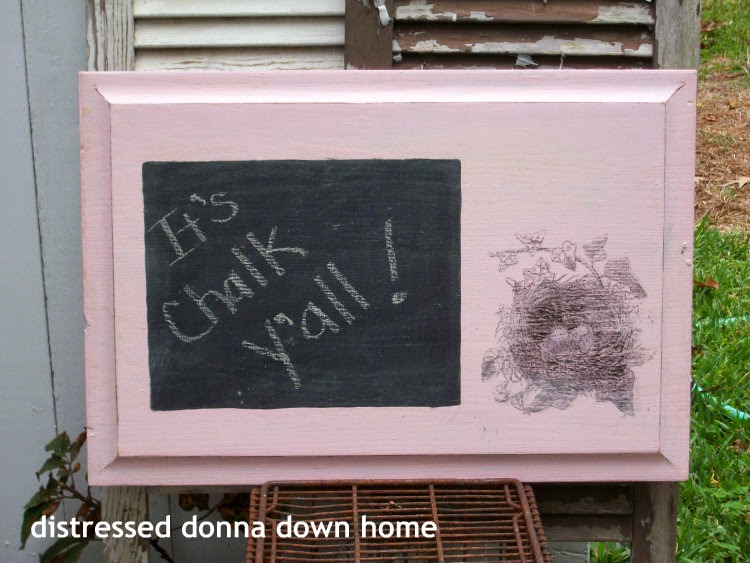
Which reader looked at the four doors yesterday and thought, "Why didn't she make chalkboards?"
Well, I did!
Sort of.
I took a chisel and a hammer to the two damaged doors to take out the panels in each frame.
Whole doors.
One door on the operating table ready to be dissected.
Dissection is successful on the first door.
The other door was up next and all four panels were ready to be repurposed.
A sanding and cleaning for each.
A quick mixture of my homemade chalk paint - Ballerina Slipper Pink.
Two coats on the front side.
One coat on the back side.
All quickly dried.
Next I sanded each for distressing.
What? You thought I would leave that step out?
Never.
Remember these doors were oak which means a heavy grain.
So I finished with a coarse paper towel to make the finish as smooth as possible.
Applied two coats of satin varnish to the front.
Chose a nest image from The Graphics Fairy.
Used the waxed paper method.
Thanks for the idea, Audrey!
It took about fifteen minutes to complete all four transfers.
It is a easy way to transfer images unless you are a perfectionist.
I sealed each nest with two light coats of a spray satin varnish after they had cured for about 24 hours.
I found a frame the size of the chalkboard and traced it lightly in pencil.
I did not tape the edges.
I am rather proud of my ability to paint in a straight line.
The trick is in the brush and how you hold it.
After two coats of the commercial blackboard paint, I conditioned each with chalk.
They are now ready to go forth into the world.
No one will ever know they were once plain cabinet doors.
REMEMBER: Make It Monday starts Sunday (tonight) at 7PM Eastern. We would love to see your posts linked there!
See y'all!
 |
Use this discount code to receive 10% off your purchase at the Distressed Donna Etsy store:DISTRESSEDDONNA14SHOP HERE! |
<
You're Gonna Love It Tuesday
Share Your Cup Thursday #123
Feathered Nest Friday
Shabbilicious Friday
The Cottage Market Presents Junkin' Joe Every Friday


I would never have guessed they were door panels! You did an amazing job at transforming them!
ReplyDeleteCute, cute, cute! These will be very popular!
ReplyDeleteThese turned out great!! Wonderful job 😄
ReplyDeleteSusan
They turned out beautifully! I'm sure they won't be taking up space at the booth for long! Do you ever rest? LOL!
ReplyDeleteGorgeous Donna! You did an amazing job transforming them!
ReplyDeleteDonna ... you are one of the fastest workers I know of. It would have taken me a week to do all that. They turned out so cute and should sell quickly ... love the nest on there too. Easy transfer method ... glad you enjoyed doing it.
ReplyDeleteThanks for the link-back.
Audrey Z. @ Timeless Treasures
They turned out just great! I love the pink with the chalkboard paint, and that transfer looks fabulous. I've never tried any transfer method because I thought it would be too hard, but I might try this one if it's easy. I like a little imperfection.
ReplyDeleteAbsolutely amazing! I wish I had your talent!
ReplyDeleteGreat redo Donna.......love it!
ReplyDeleteYou really do keep busy.......I am amazed!!
gorgeous, I used freezer paper once and it was horrid, need to try the wax paper method!
ReplyDeleteDonna, I love the pink chalkboards. I will have to try the wax paper method for transfer!
ReplyDeleteWow! You wasted no time getting right on that project girl! Lovely as always!
ReplyDeleteFABULOUS!!
ReplyDeleteLove this project!
ReplyDeleteSuper cute Donna! I love the graphic that you used. Great job drawing straight lines indeed! Thanks for sharing with SYC.
ReplyDeletehugs,
Jann