Usually I can say anyone can do this, but this project is a little advanced for beginners. There are plenty of pictures to help if you decide to do this. I'll try to remember to add odd details that otherwise might be left out.
Remember Bonnie Blue - that round face, those blue eyes, those curls? I envisioned a hat just right for her with blue birds adorning it.
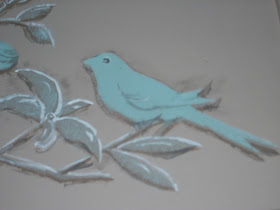
To be honest, the birds are not really blue, but sea mist.
This is what I started with - a misused coffee table from a house clean-out. Someone had used it to put paint cans on - black and white paint to be exact. The cans left rings. I saw potential here with that expanse of the top.
What kind of paint frame is that!?! Long ago, kids, when I was young, we had metal garbage cans. The cans would fit into the frame with the bottoms resting on the triangular-shaped braces. This prohibited animal invasions!
I needed the metal paint frame for another project so Bonnie Blue Birds was moved to the old recycle bins to dry.
Long ago, kids, we had three bins of different colors. One for glass, one for paper, and one for cans. Now we have a big blue rolling cart, and the prisoners sort the recycle for us!
Bonnie Blue Birds is now greige - a Valspar paint and primer mistint that was $2. I thought it was going to be more gray, but sometimes I am wrong. (Don't tell Chucks!)
Long ago, kids, when I promised never to use stencils again, I was lying. I cannot seem to stay away from them.
This time there are three, count them, three stencils from Show-Offs at Hobby Lobby.
You can only use one at a time because of space issues. I started with the large bird in the center, then the right, and last the left stencil. I used an old stencil brush with some wild hairs to make the edges a little fuzzy.
All paints were Folk Art craft paint. First I used mushroom.
You might be tempted to stop here, but don't.
I moved the stencils about 1/8 inch to the upper right to stencil with barn wood.
You might be tempted to stop here, but don't.
I moved the stencils another 1/8 inch to the upper right to stencil with sea mist. The birds got a heavy dose of paint and the leaves a lighter touch.
You might be tempted to stop here, but don't.
Ordinarily I do stop after the third stencil, but this time we are going to switch to actual painting.
It takes patience - you can learn!
I took a liner brush (long thin bristles) to outline the berries, leaves, and branches with winter white.
Just think where is the light to decide which side to paint. I like to paint in natural light instead of artificial light because it is easier for me to highlight correctly.
I know I have the after berries before the before berries.
The little dot of white just adds dimension.
Stay with me now - you can do this.
Here I have highlighted all the tree branch parts.
You can tell how much the highlighting adds to the overall painting of the birds.
Here is a close-up of the center bird.
Here is a close-up of the right bird.
There are no longer any stencil voids - I have filled them in.
Now to add a little smidgen of realism to the birds. You don't want to go too far - you want it to look primitive.
I used medium gray to outline the parts of everything that would be in the shadow. This would be the opposite side of the white highlight.
Why? It gives the painting more depth. From the photo you can see that the birds are no longer laying flat, but appear to be raised from the surface of the table.
I gave each bird an eye - a c-shaped curve with medium gray with a highlight of white.
A few light strokes of the liner brush and you have wings.
Always hold the brush perpendicular to the surface for better control.
If you look closely around the bird and the leaves, there is a shadow behind them. Using the medium gray and a scrumble brush ( a worn-out one with splayed bristles), I dipped the brush into the paint and then dried most of it off on a paper towel and then gently scrubbed it around the objects creating shadows.
Just a picture of the bird on the left - I seem to be leaving him out of this post. He was getting the same treatment as the other two!
I did sign this. I am a strong believer in people signing their work.
Chucks did want to know what the '12 was for. I gently explained to my absent-minded husband we had entered the new millennium and it was 2012.
And no, he did not have a personal jet pack or a flying car - those were promised to us by our Weekly Readers in the 1960's!
You can relax now - no more hard stuff. It is time for waxing Miss Bonnie Blue Birds. I pulled out the Howard's Citrus Shield in dark oak, dragged her outside, and began to wax.
Fast, quickly, speedily - a storm was brewing right over me. I do a lot in the house, but I do not, never, ever use wax in there. I am too klutzy!
I made it! Miss Bonnie Blue Birds is now in the car waiting to go to the shop. She looks great with the dark wax distressing her just a bit.
Here is the whole family of blue birds - well, really, sea mist birds! The photo is crooked - remember I was trying to beat a storm!
Oh, there go my towels - gone with the wind. Oh, well, Bonnie Blue Birds is safe! (For now, someone will probably buy her and paint her again!)
I hope this post encourages you to go beyond the stencils into real painting. Trust me, if I can do it, anyone can! Thanks for stopping by. The storm has passed so I am off to another project!


This is just beautiful, Donna!!! You are so talented...
ReplyDeleteHugs
fantastic stencilling !
ReplyDeleteGreat work Donna ... I like how you turned a flat stencil project in to a dimensional work of art. Beautiful.
ReplyDeleteAudrey Z. http://audreyzumwalt.blogspot.com/
Go beyond stencils???!!! I can't even do basic stencils!! Yours is sure beautiful though! You are seriously talented!
ReplyDeleteThis is "So Beautiful"!!! I love your talent!!! I saw a table today at a tag sale that caught my eye AND I pondered over it, walked away, came back and looked at it some more...BUT...left without it! OH MY GOODNESS, that table would have been "PERFECT" for THIS! Hmmmm, I guess your post must have been CALLING ME! MAYBE because you are a sister"Donna",hehe!!!
ReplyDeleteHave a fun weekend, and Thank you for sharing... Thank you ALSO for the pleasant visit to my cottage. I LOVE company!
Hugs,
Donna
Oh my, you are one talented lady!! That is amazing and beautiful! I love it. Thanks for visiting me. Making my rounds from Twigg's party! :)
ReplyDeleteWay to go Donna! I love this, especially since I have just gotten back into my stenciling! I've been playing around with stencils and combining it with some of my Tatouage(rub-ons)! I love trying to create the dimensional look and your tutorial is the easiest I've seen. Thanks for sharing and for partying at Frugal Treasures Tuesday each week! -_^
ReplyDeleteBarbe
When I saw the first image here, I thought this was a raised pattern you were going to show us you had highlighted with paint. Then I discover that no, that is just your stellar technique creating that incredible effect. I don't have much in the way of painting skills (I'm best at shoving junk into the back seat, although for two weekends in a row, I have come home empty handed) however, with your help, I may have to give this a try. Great instructions and photos, by the way. Thanks!
ReplyDeleteLiz
Beautiful job! I have these same stencils... thank you for the inspiration! I'm glad to be following you now. Please stop by bellanest.blogspot.com any time!
ReplyDeleteDonna, I had to come over again, LOL!
ReplyDeleteI love the little jokes you add here and there.
I love that you started with stencils it gives me the illusion one day I can do something like that, LOL!
The result is amazing, nobody will paint over that!
Hugs,
What a transformation...even though I'm not a painter I think I could follow your directions. Well done!
ReplyDeleteDonna...You're colors are beautiful...Blessings, Becky
ReplyDeleteOh, your blue birds are so cute. Nice job, Donna.
ReplyDeleteWhat a beautiful job you have done on this table, Donna--all of the detail and thought that goes into each step really shows your artistry. Good idea of using the old recycling crates to raise your painting project up to make it easier to work on. I love birds, and just love the blue birds on this lovely table. I do so appreciate you stopping by my blog today and leaving such an encouraging comment--thank you. And I loved Weekly Reader back in the day!
ReplyDeleteFantastic job! Thanks for the Tutorial.
ReplyDeletexo
Ruth
Beautiful table and I really enjoyed reading your tutorial about adding depth and lights/shadows.
ReplyDeleteWhat a lovely re-do. Your blue birds are so charming.
ReplyDeleteGreat job! Connie :)
Another beautiful project; love the blue!!
ReplyDeleteNancy
Hello Donna, thank you so much for following. I am over-joyed and truly appreciate the encouragement. Connie :)
ReplyDeleteP.S. I have added you to my Blog-list.
Would you give this to me? I promise to be so very good to it. When I seen the stencils i knew how I wanted to finish my table top that's been waiting forever for me to decide. Oh an i was right with you until you keep sifting to the right? Oh well mine might not look a good as yours, but that's ok! Thanks for sharing your creative inspiration with Sunday’s Best – you helped make the party a success!
ReplyDeleteHi! I'm visiting from Make it Great Monday @ Etcetorize. I love your birdies! You make it look so easy! The shading really makes the images look much more dimensional. I have a similar stencil & I will have to give this a try. Thank you!
ReplyDeleteIf you get a chance, check out my birdhouses at: https://www.facebook.com/media/set/?set=a.3954171886169.2152706.1036342162&type=3&l=5afbaacbb7
very cute and it gives me a great idea to finish a tv tray i've been stalled on thanks so much for stoping by my blog
ReplyDeletehave a lovely week
Your paint job is beautiful. Love the colors you have selected.
ReplyDeleteWow, this is gorgeous! Wonderful job on the painting!
ReplyDeleteI just love this!!! It would be crazy to paint over those beautifully painted blue birds! Wish I were in the market for a coffee table! Someone will snap this up in a heartbeat!!!
ReplyDeleteThis project is adorable! I am your newest follower. I can't wait to see what you come up with next. Thanks for stopping by Posed Perfection last week and leaving me a sweet comment on my Green Packaging Solutions. I like your idea of the little gifts throughout the year. I hope you'll visit again and maybe even "follow me" back.
ReplyDeleteBlessings,
Nici
Wow, beautiful table! Liz
ReplyDeleteOk, wow! You are one talented lady! Perfect. Thank you for sharing this at my Make it Pretty Monday party at The Dedicated House. Toodles, Kathryn @TheDedicatedHouse
ReplyDeleteBeautiful ~thank you for sharing at Feathered Nest Friday!
ReplyDeleteThats really beautiful!
ReplyDeleteDonna, this is fantastic. I can see why you can't stay away from stenciling--you know how to really use them! Thanks for the step by step details with pics :) Thank you for linking this up to Rustic Restorations Weekend.
ReplyDeleteBeautiful makeover! Love the bluebirds.
ReplyDeleteDonna this really turned out beautifully!!
ReplyDeleteThanks so much for linking up at I Gotta Create! <3 Christina
Your table turned out great! Thanks for stopping by and commenting on my lamp shade- somehow your comment got sucked in by the spam police and I just found it. :\
ReplyDeleteLooks lovely Donna. Thanks for sharing at Shabbilicious Friday.
ReplyDelete